

Bra size measurement: how to get an accurate result at home
Measure two numbers and you have your starting bra size in under two minutes. Wrap a tape under your bust for your band measurement, then around the fullest part of your bust for your overbust measurement. Round the band to the nearest even number, subtract the band from the bust, and match the difference to a cup letter.
- Band: measure firmly under the bust, level all round.
- Bust: measure at the fullest point, tape relaxed and parallel to the floor.
- Difference to cup: 1 inch = A, 2 inches = B, 3 inches = C, 4 inches = D.
Each inch of difference between bust and band typically equals one cup size, so a 32-inch band with a 35-inch bust gives a 3-inch difference and a C cup, landing you on a starting size of 32C. Treat this as your first size to try on, not a final verdict. Breast shape, bra style, and even the brand’s own cut will shift the fit from there.
Key Takeaways
Getting your bra size right starts with an accurate band and bust measurement, and finishes with a physical fit check, not a calculator screen.
| Point | Details |
|---|---|
| Measure unpadded | Take band and bust measurements in a non-padded bra or fitted T-shirt for an accurate bust figure. |
| Round the band | Round an odd or decimal underbust number up to the nearest even whole number before calculating. |
| Calculate the cup | Subtract the rounded band from the bust; each inch of difference equals one cup letter (1=A, 2=B, 3=C). |
| Try sister sizes | Shift up or down a band size and adjust the cup letter opposite way if the first calculated size doesn’t sit right. |
| Confirm with Lingerie Seduction | Check your numbers against the Australian size chart and try a stocked style, backed by free shipping over $100 and hassle-free returns. |
Table of Contents
- How to measure your bra size at home step by step
- How do you calculate cup size from your measurements?
- Sister sizes and a fit checklist for when the number feels off
- Should you trust an online bra size calculator?
- Where Lingerie Seduction fits into your measuring routine
- Does it matter if you measure in a padded bra?
- What if your breasts aren’t symmetrical?
- Measuring alone versus getting help from someone else
- What tools actually make bra measurement accurate?
- Editorial take: measurement gets you 80% of the way, not 100%
- Ready to shop your measured size?
- Sources
- FAQ
How to measure your bra size at home step by step
Getting a reliable band and bust measurement is mostly about tape placement and posture, not fancy equipment. Rushed measurements are the number one reason women end up with the wrong size, so slow down for these steps.
- Strip back to a non-padded bra or a fitted T-shirt. Padding, moulded cups, or a bulky top will throw both numbers off. Fit experts recommend measuring in a non-padded, unlined bra for this exact reason.
- Wrap the tape under your bust for the band measurement. Keep it level all the way round, sitting snug against your ribcage, not pulled up at the back. It should feel firm but you should still be able to slide two fingers underneath it comfortably.
- Take a breath and check the tension. If you can’t breathe normally, it’s too tight. If it slides down when you raise your arms, it’s too loose.
- Measure the fullest part of your bust. Stand relaxed, arms at your sides, and wrap the tape around the fullest point of your chest, keeping it level and parallel to the floor front to back. Don’t let it dip at the back or ride up at the front.
- Round the band measurement. Round an odd or decimal underbust figure up to the nearest even whole number — 31.5 inches becomes 32, for example.
Pro Tip: No tape measure in the house? A length of ribbon or non-stretch string works just as well. Wrap it around your body the same way, mark where it overlaps, then lay it flat against a ruler to read the number.
If you’re between two band sizes after rounding, the general rule is to try the smaller number first and size up in the cup if the band feels tight. Comfort under load, not the number on the tag, is what tells you if the measurement worked.
How do you calculate cup size from your measurements?
The cup letter is not a fixed size. It’s a ratio between your band and bust measurements, which is why the same cup letter feels completely different on two women with different band sizes.
Subtract your rounded band number from your bust number to get the difference in inches, then match it against this scale:
- 0 inches difference = AA
- 1 inch = A
- 2 inches = B
- 3 inches = C
- 4 inches = D
- 5 inches = DD/E
- 6 inches = F
A D cup on a smaller band holds less volume than a D cup on a larger band, even though the letter is identical, because cup size is proportional to band size. That’s because the cup is sized relative to the band it sits on, not as an absolute measurement. When you’re checking a brand’s size chart, look for whether it states AU/UK sizing specifically. US and European cup labelling can shift by a letter or two at the same underlying measurements, and a chart that doesn’t flag which system it’s using is one to treat with caution.
Sister sizes and a fit checklist for when the number feels off
Your calculated size is a starting point, not a guarantee. If the cups pinch but the band feels right, or the band gapes but the cups fit, a sister size usually solves it before you need to remeasure from scratch.
- Band too tight, cup fits: go up one band size and down one cup letter (32C becomes 34B).
- Band too loose, cup fits: go down one band size and up one cup letter (32C becomes 30D).
- Cups too small, band fits: stay on the same band and go up one cup letter only.
Run through this checklist once the bra is on and fastened:
- Band: sits level, doesn’t ride up at the back.
- Straps: stay put without digging in or slipping.
- Cups: no spillage, no gaping or wrinkled fabric.
- Gore: the centre panel lies flat against your sternum.
- Movement test: raise your arms, twist side to side; nothing should shift.
Pro Tip: Fasten a new bra on the loosest hook first. The elastic relaxes with wear, and you’ll move to tighter hooks over its lifespan rather than starting there.
If several sister sizes still feel wrong, the issue is usually the style, not the size. Balconette cuts, plunge shapes, and full-coverage designs each distribute volume differently across the same cup letter.
Should you trust an online bra size calculator?
A calculator is only as good as the numbers you feed it and the sizing system it outputs. Online calculators can convert your measurements across AU, UK, US, and EU systems, which is genuinely useful if you’re shopping a mix of local and international brands.
Before trusting any result, check that it:
- Asks for both centimetres and inches, since a mismatch here throws off every downstream number.
- States clearly which sizing system it’s outputting, especially AU or UK.
- Explains its rounding rule rather than just spitting out a number.
- Offers a conversion chart alongside the raw calculation.
Treat the output as step two, not the final answer. The workflow that actually works is measure, run the calculator, try the bra on, then adjust with a sister size if needed. No calculator can account for how your particular breast shape sits in a particular cut of cup.
Where Lingerie Seduction fits into your measuring routine
Once you’ve got a working number, the next job is matching it to real stock. Lingerie Seduction’s Australian size chart converts your measurements into local sizing, and the step-by-step measuring guide walks through the same process with visuals if you’d rather follow along than read.
- Check the size chart against your calculated band and cup before ordering.
- Read each product’s fit notes, since cut varies by style even within one size.
- Try a sister size if the first result feels borderline.
Pro Tip: If you’re between two sizes, order the one your gut says fits looser through the band. Free returns mean a swap costs you nothing but time.
Free shipping applies to orders over $100, and returns are hassle-free if the size you calculated doesn’t translate the way you expected.
Common sizing errors, like measuring over a padded bra or letting the tape ride up at the back, are covered in more depth in the guide to common lingerie sizing mistakes, worth a read if you’ve been caught out before.
Does it matter if you measure in a padded bra?
Yes, and it’s one of the most common reasons a calculated size doesn’t match reality. Padding and moulded cups add bulk to the overbust measurement without adding any actual breast tissue, so you end up with a bust figure that’s inflated by a centimetre or two of foam.
The fix is straightforward: measure in a non-padded, unlined bra, or skip the bra altogether and use a fitted T-shirt instead. Either option gives the tape a true read on your actual shape rather than the shape of the bra you’re wearing.
If you only own padded or push-up styles, don’t assume you can just “estimate” the padding thickness and subtract it. Padding compresses unevenly depending on the angle and tension of the tape, so the error compounds rather than cancels out. A fitted, thin cotton tee is a far more reliable stand-in.
There’s a flip side worth knowing too: once you’ve measured accurately in an unpadded state, that number still applies when you go on to buy a padded or push-up style. The band and cup calculation doesn’t change based on what you plan to wear afterwards, it only changes based on what you’re wearing while you measure. Keep the two separate in your head and you’ll avoid the trap of remeasuring every time you switch styles.
What if your breasts aren’t symmetrical?
Almost no one has two breasts that are exactly the same size, and it’s normal enough that it shouldn’t derail your measurement. The practical fix is to always size the cup for the larger side and use the extra room on the smaller side to your advantage rather than treating it as a problem.
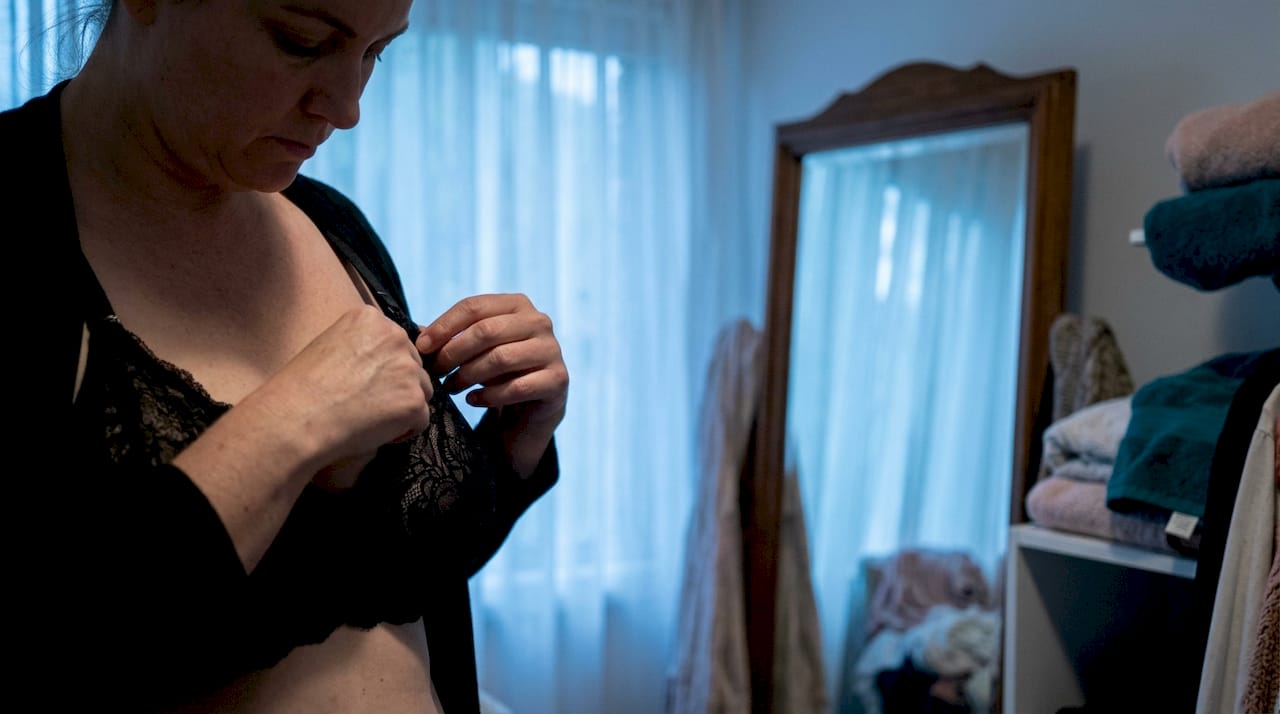
For fuller or more pendulous breast shapes, a straight-on measurement can miss tissue that sits lower or further to the sides. Leaning forward at roughly 90 degrees while measuring the bust can help capture that volume more accurately before you straighten back up to confirm the number. If you’re measuring standing upright and getting a figure that feels too small compared to how your bras currently fit, this forward-lean method is worth trying as a cross-check.
Asymmetry also shows up at the try-on stage more than the measuring stage. If one cup gapes slightly while the other fits snugly, that’s expected and not a sign you’ve measured wrong. A padded insert or a slightly gathered cup shape on the smaller side handles this better than sizing down the whole bra and compressing the larger side.
Measuring alone versus getting help from someone else
Both work, but each comes with its own failure point to watch for. Measuring alone in front of a mirror gives you full control over tension and placement, but it’s easy to unconsciously loosen the tape at the back where you can’t see it, which skews your band measurement.
Having someone else measure you removes that blind spot, since they can check the tape is level all the way round from a angle you simply can’t see on yourself. The trade-off is that you lose the direct feel for tension, so communicate clearly. Ask them to keep it “firm but breathable” rather than leaving it entirely to their judgement.
If you’re measuring alone, a full-length mirror positioned to the side, not just straight on, helps you catch a tape that’s dipped or risen at the back. Photographing the setup on a timer, tape in place before you pull it snug, is another workaround that gets you a second, more objective look without needing another person in the room.
Whichever method you use, take the measurement twice and compare. A difference of more than half a centimetre between the two attempts usually means the tape shifted, and it’s worth a third read to settle it.
What tools actually make bra measurement accurate?
A soft, flexible measuring tape, the kind used for sewing rather than a rigid tool tape, is the single most important item. Rigid tapes don’t curve properly around the ribcage and bust, and they’re prone to giving a falsely low reading because they can’t sit flush against the body’s curve.
Beyond the tape itself, a few extras make the process meaningfully more reliable. A well-fitted, non-padded bra or thin T-shirt gets your bust measurement, while a plain length of ribbon or string acts as a solid backup if you don’t own a tape measure. A full-length mirror, or a willing second pair of hands, catches the tape drifting out of level, which is the single biggest source of a wrong result.
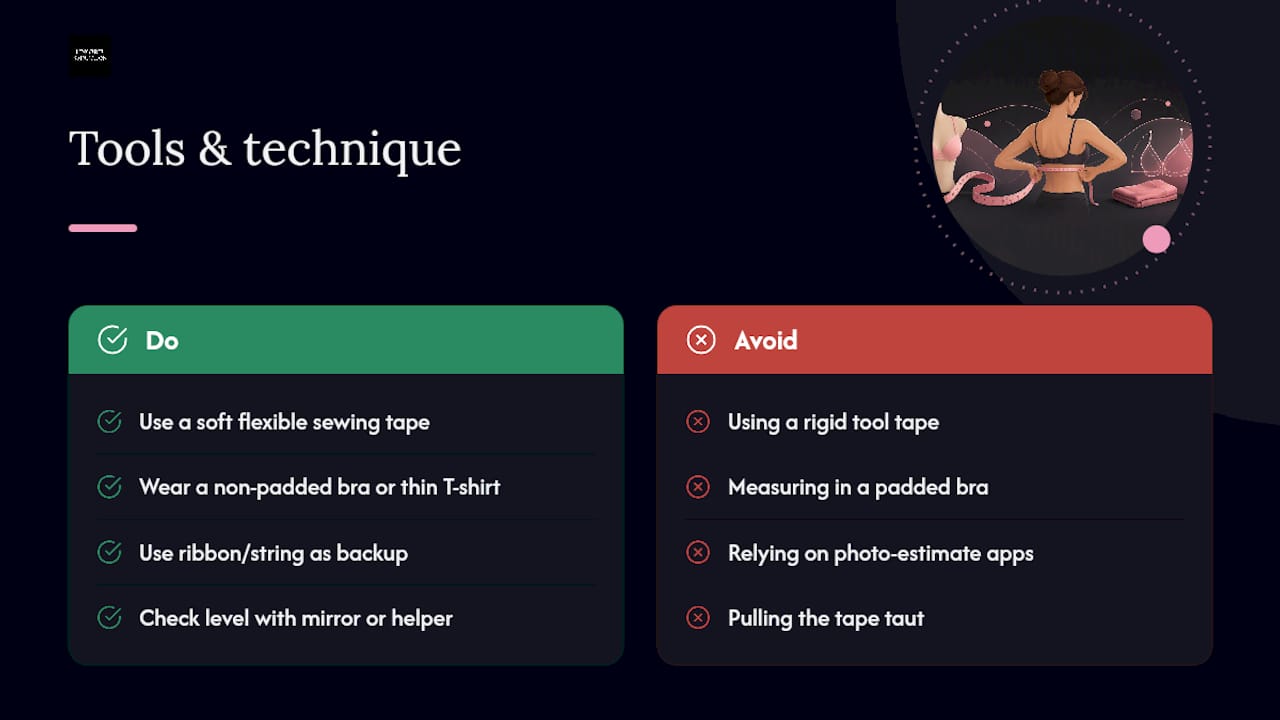
Good general apparel measuring technique, including how to keep a soft tape at consistent tension without pulling it taut, carries over well from other clothing categories. Some general size-guide principles apply just as much to a bra band as they do to a T-shirt hem. Skip the temptation to use a phone app that estimates measurements from a photo. Those tools struggle with the same padding and posture issues that trip up manual measuring, without the ability to feel tension the way your hands can.
Editorial take: measurement gets you 80% of the way, not 100%
The conventional advice on bra fitting oversells precision. Endless articles promise that a perfect tape measurement equals a perfect bra, when in reality the formula only narrows the field. Breast shape, tissue distribution, and even how a particular underwire is cut all sit outside what a tape can capture.
What’s underrated is the fit checklist. Most guides treat the band and cup formula as the finish line and the try-on as an afterthought. We’d argue it’s the other way around: the numbers get you in the right ballpark, and the checklist, band level, straps still, no gaping, is what actually confirms the size. Prioritise the try-on and the sister-size adjustment over chasing a “more accurate” measurement technique. No amount of remeasuring replaces putting the bra on and moving in it.
— Lingerie Seduction
Ready to shop your measured size?
Once you’ve got a band, a cup, and a checklist of what “fits well” actually feels like, the next step is finding styles built to that size range without guessing your way through a catalogue. Lingerie Seduction stocks a genuine spread of AU sizes across everyday and statement pieces, so a size you’ve just calculated has somewhere real to land.
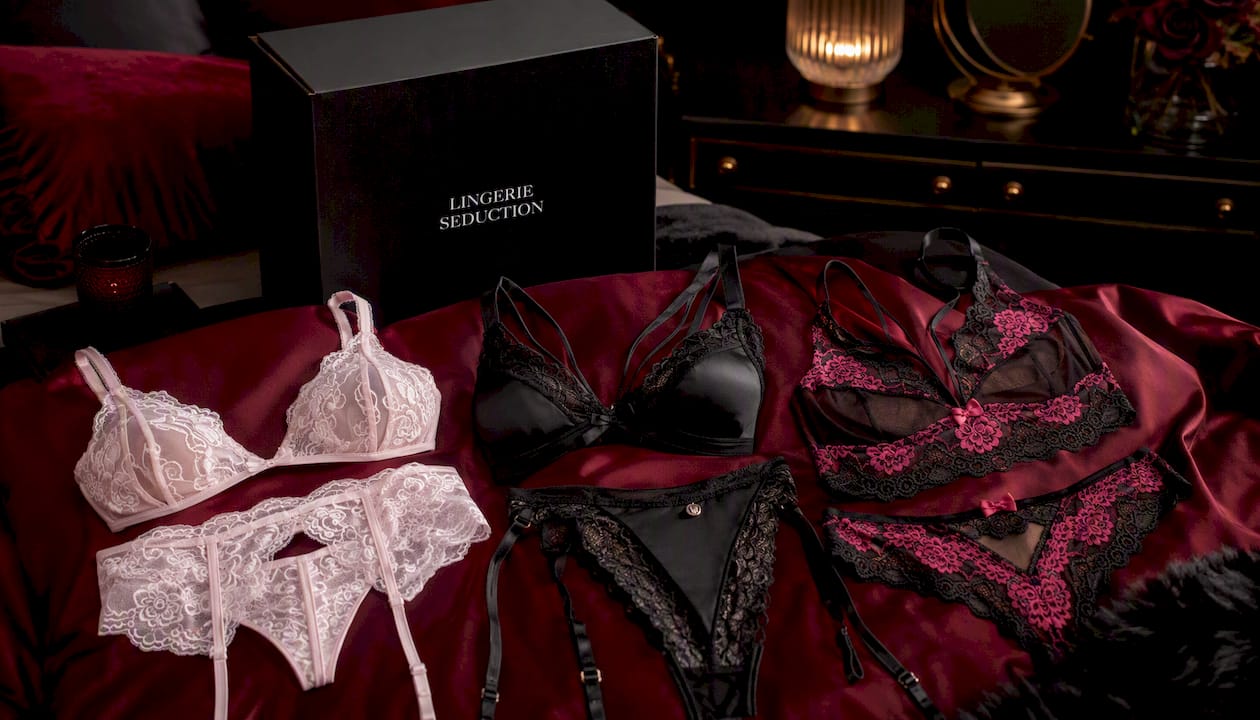
If your numbers point to a fuller cup with delicate detailing, the Baby Pink Lace Tri Bra & Suspender Belt Set is worth trying in your calculated size, with a sister size ready as backup if the band or cup needs a nudge. For something with more structure and a bolder edge, the Matte Black Satin & Lace Bra & Gsrting Set shows how the same sizing principles apply across a firmer cut. And if your measurements land you on a lighter cup depth, the Cute Pink & Black Sheer Lace Bra Set is a good style to test first.
Every order over $100 ships free, and returns are hassle-free if a size doesn’t land the way the maths suggested. Measure, check the Australian size chart, and pick a style. If it doesn’t fit right first go, send it back and try the sister size next.
Sources
- How to Measure Your Bra Size, According to Fit Experts
- Bra size conversion and mapping
- How to Measure Your Bra Size at Home in 4 Simple Steps | Glamour
- Bra size calculator
FAQ
How do I measure my bra size at home?
Wrap a soft tape under your bust for your band size, then around the fullest part of your bust for your bust size, keeping the tape level and relaxed for both.
How do Australians measure bra size?
The method is the same as elsewhere: measure band and bust in centimetres or inches, then check the result against an AU-specific size chart, since cup labelling can shift slightly between AU, UK, US, and EU systems.
How do I calculate my cup size from my measurements?
Subtract your rounded band measurement from your bust measurement in inches. A 1-inch difference is an A cup, 2 inches is a B, 3 inches is a C, and 4 inches is a D.
Which cup size is bigger, B or C or D?
D is bigger than C, which is bigger than B, but only relative to the same band size. A D cup on a small band can hold less volume than a B cup on a much larger band, because cup size is a ratio, not a fixed measurement.
How often should I remeasure my bra size?
Remeasure at least once a year, and again after any major body change such as pregnancy, significant weight shift, or surgery.
What if my calculated size doesn’t fit properly?
Try a sister size first, shifting the band up or down one size while adjusting the cup letter in the opposite direction, before assuming the measurement itself was wrong.


